Login with Social Media
Currently we support login using Google and Facebook. This guide will walk you through the steps to configure OAuth authentication using Google and Facebook in a Strapi.
Prerequisites
Before starting, ensure you have the following:
- A Strapi application set up and running.
- Admin access to the Google Developer Console.
- Admin access to the Facebook Developer Console.
Step 1: Configure Google OAuth
1.1 Create a Google OAuth Client
- Go to the Google Developer Console (opens in a new tab).
- Create a new project or select an existing project.
- Navigate to Credentials from the left sidebar.
- Click Create credentials and select OAuth client ID.
- Configure the OAuth consent screen:
- Fill out the required fields and save.
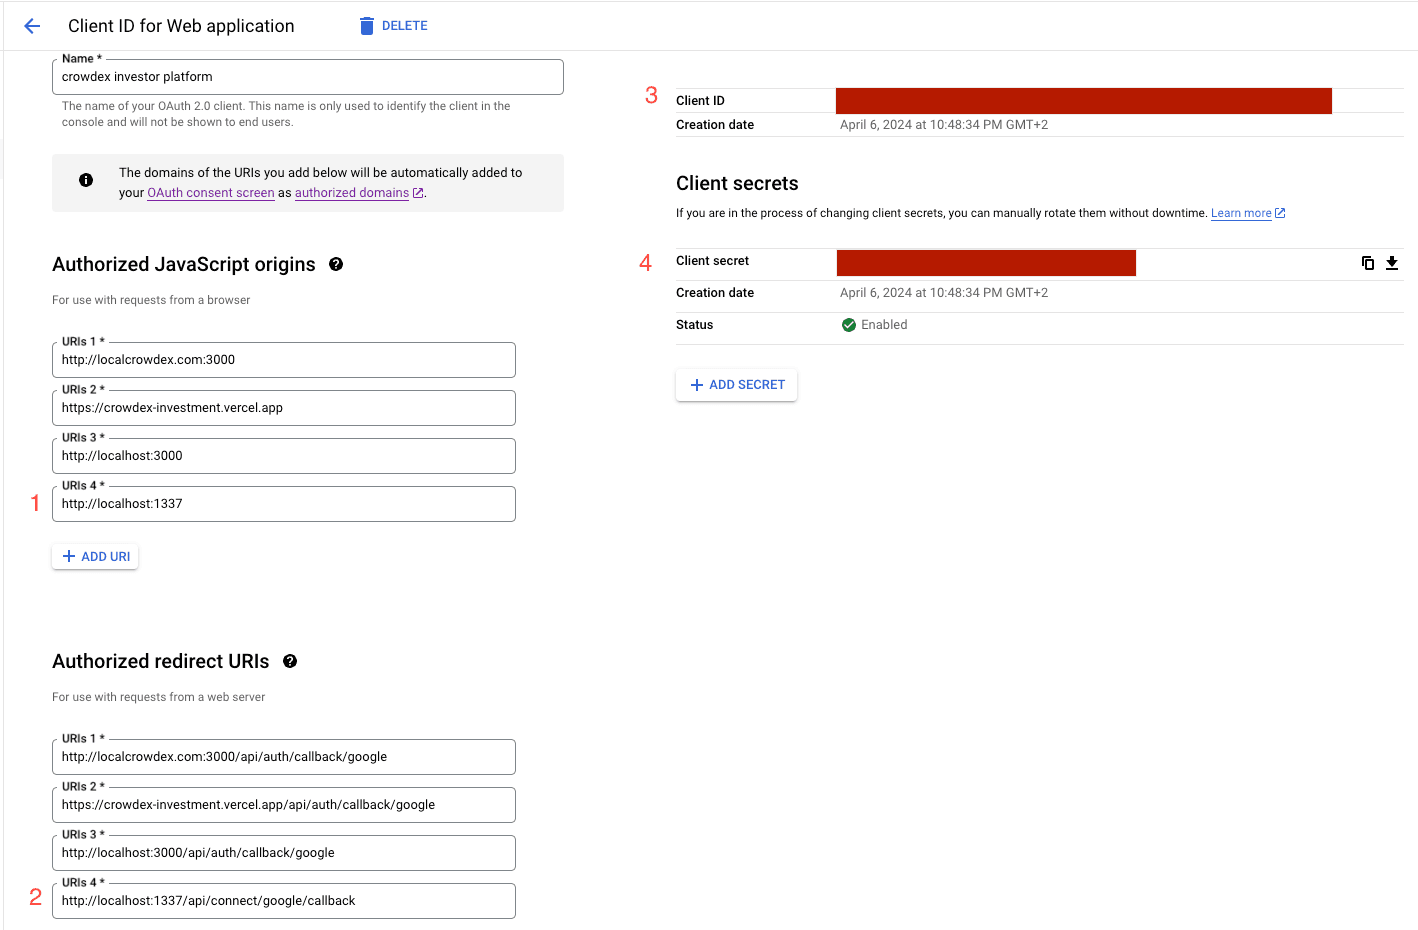
- Select Web application as the application type.
- Add your authorized redirect URIs:
- For example:
http://localhost:1337/api/connect/google/callback
- For example:
- Click Create and note down the Client ID and Client Secret.
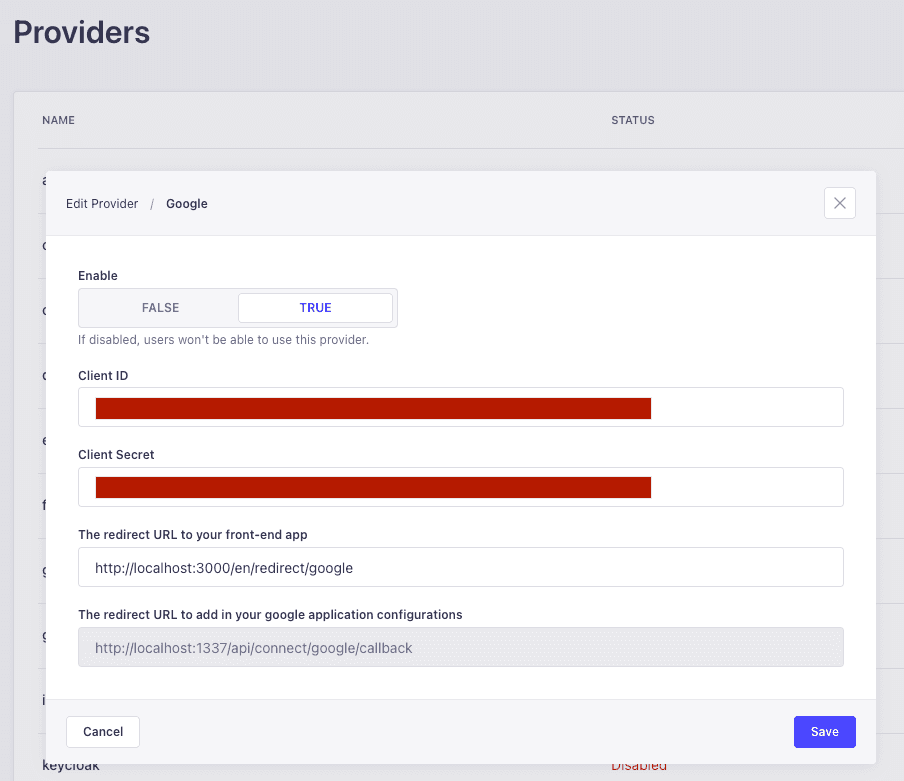
1.2 Configure Google Provider in Strapi
- In your Strapi admin panel, navigate to Plugins > Users & Permissions > Providers.
- Find and enable Google.
- Enter the Client ID and Client Secret obtained from the Google Developer Console.
- Set the The redirect URL to your front-end app to
http://localhost:3000/en/redirect/google. Where localhost:3000 is the domain of the frontend app. - Save the configuration.
Step 2: Configure Facebook OAuth
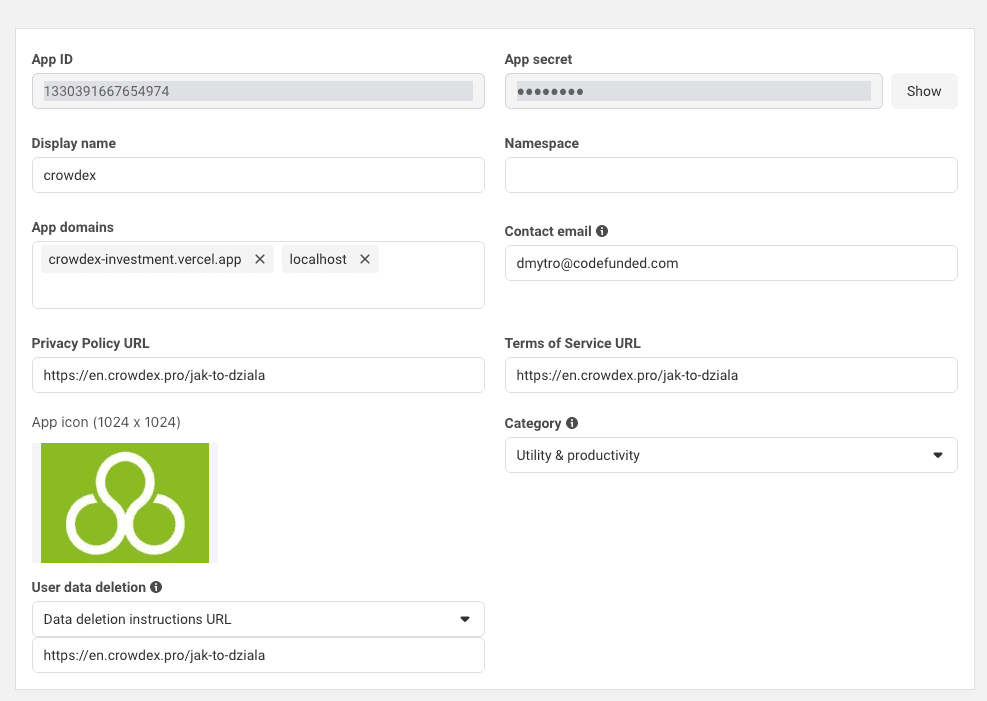
2.1 Create a Facebook App
- Go to the Facebook Developer Console (opens in a new tab).
- Create a new app or select an existing app.
- In the Add a Product section, select Facebook Login and set it up.
- Go to Settings > Basic and note down the App ID and App Secret.
- Navigate to Facebook Login > Settings and set the Valid OAuth Redirect URIs:
- For example:
http://localhost:1337/api/connect/facebook/callback
- For example:

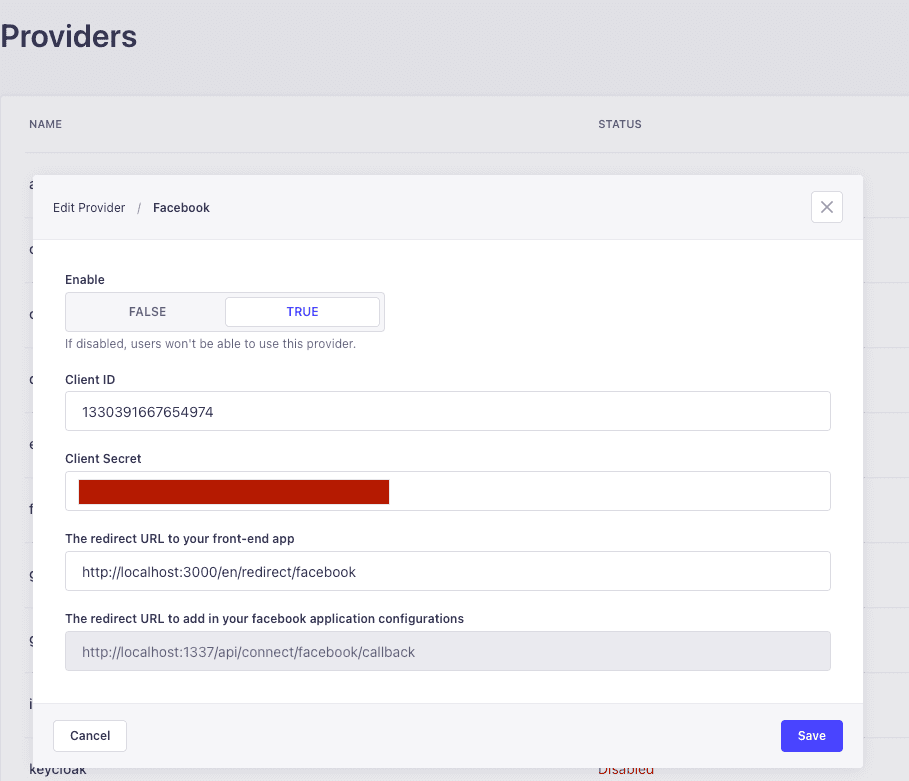
2.2 Configure Facebook Provider in Strapi
- In your Strapi admin panel, navigate to Plugins > Users & Permissions > Providers.
- Find and enable Facebook.
- Enter the App ID and App Secret obtained from the Facebook Developer Console.
- Set the The redirect URL to your front-end app to
http://localhost:3000/en/redirect/facebook. Where localhost:3000 is the domain of the frontend app. - Save the configuration.
Step 3: Testing the OAuth Configuration
- Go to your Strapi application's front end or admin panel.
- Trigger the OAuth login flow by navigating to the following URLs:
- For Google:
http://localhost:1337/api/connect/google - For Facebook:
http://localhost:1337/api/connect/facebook
- For Google:
- Complete the authentication process using your Google or Facebook account.
- Verify that you are successfully logged in and that the user information is correctly retrieved.